 Image credit: CodeRed LLC
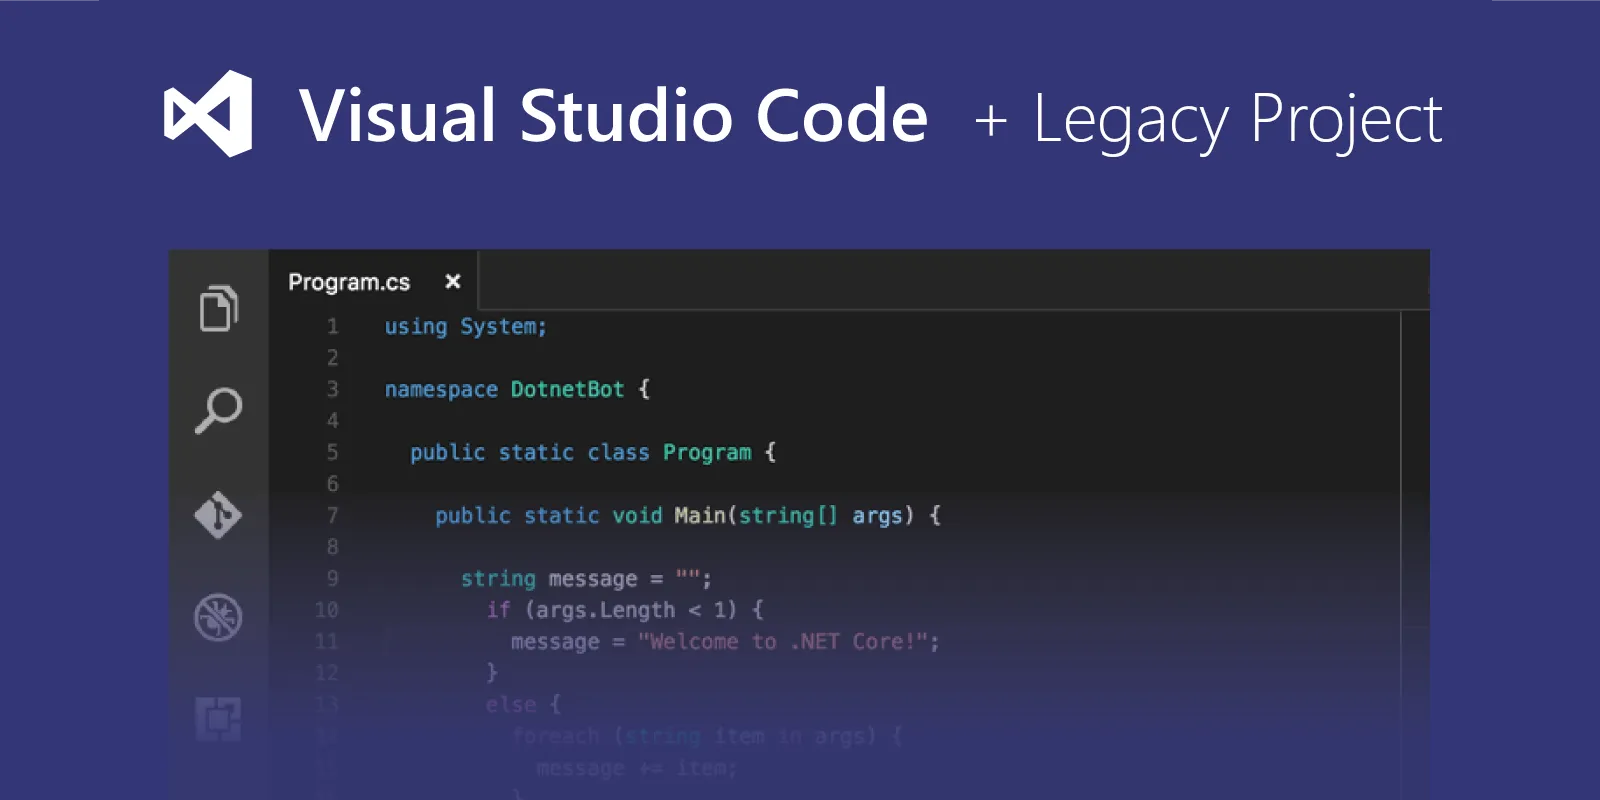
Originally published: August 8, 2018.
Updated for 2019: more modular install and no longer depends on full version Visual Studio!
I think one of the worst parts about working with a “legacy” codebase is often times the tooling. For years any .NET project had a tight ball-and-chain relationship with Visual Studio, SSMS, and many other multi-gigabyte Microsoft GUIs.
Wanting to modernize, Microsoft open-sourced a new light-weight cross-platform version of .NET called dotnet core. In tandem they have also released a fantastic minimal editor called Visual Studio Code, or VS Code for short.
Unfortunately, most VS Code tutorials center around the newer dotnet-core language, and not on older versions of .NET and VB. In this post I will walk you through how to use VS Code with an existing C# of VB project. I am assuming that you already have the project working and building in Visual Studio, which is still unavoidable to ensure you have the correct tooling installed on your machine. Update: Now that Microsoft has released separate installers for Visual Studio build tools, you no longer have to install Visual Studio at all! This tutorial will assume that you are starting out from scratch without ever having installed Visual Studio before.
1. Install VS Code
Head over to https://code.visualstudio.com/and download VS Code for your operating system. Have fun customizing and installing themes, and getting a feel for the editor. I'm assuming you are already a fan of VS Code if you are reading this post.
2. Install C# Extension
Install the C# extension by Microsoft.. This extension provides some basic intellisense and syntactical features. If you find it chugging along a little slow on bigger projects, you can disable some of the code linking/reference features by turning off Code Lens in the VS Code user settings (which are stored as JSON) with this setting: "editor.codeLens": false.
3. Install the Visual Studio Build Tools
In lieu of using full-blown Visual Studio, we are going to just install the base requirement: msbuild, which is just a few megabytes. Head over to Visual Studio downloads and under "Tools for Visual Studio 2019" select "Build Tools for Visual Studio 2019". They do make it hard to find, so you can also download it directly with this link: https://aka.ms/vs/16/release/vs_buildtools.exe.
Next, you are going to run the installer and pre-select msbuild. You can alternatively double-click the installer and select various workloads or individual components, but I am a minimalist and I only want msbuild plus the web build tools, without any of the other cruft.
PowerShell / Command Prompt.\vs_buildtools.exe --add "Microsoft.VisualStudio.Workload.MSBuildTools" --add "Microsoft.VisualStudio.Workload.WebBuildTools"
You will also be able to change your selection once the GUI loads. Once you are happy with the selection, click install. If you're an automation junkie you can find the documentation about the workloads here to completely script the install.
4. Install .NET Framework
Thanks again to the efforts of .NET Core, the dotnet website now has all of the previous framework versions clearly available for download. Download the version of .NET Framework you need, select the "developer pack" download, and install it.
5. Install Nuget
Nuget is almost always needed, but never provided directly by Microsoft, even though it is just a small binary. Download Nuget for Commandline and place the .exe binary somewhere where you won't lose it... I put mine in C:\Program Files (x86)\Nuget\nuget.exe.
6. Install IIS Express (for web development only)
If you're not working on a web app, you can skip this step. IIS Express, like nuget, also happens to be a small standalone install. Download and install IIS Express 10 from here. You probably want to select the 64-bit English version.
7. Update your PATH
All this good stuff we just installed is not easily accessible from the command line, and is buried in various system directories. Now we are going to update the PATH, which is how Windows knows where to find a command when you type the command into the command prompt or PowerShell. In Windows 10:
- Type WIN+R (windows key and R)
- Enter: "SystemPropertiesAdvanced.exe" (without the quotes) and click OK to open the System Properties.
- In System Properties, click "Environment Variables..."
- Now double click "Path" to edit it. There are two paths, the user variables, and system variables. You can edit either, but the user path should be sufficient.
- Next we are going to add 3 lines here, one for msbuild, nuget, and iisexpress. First locate where these are installed in your system. They are probably somewhere in C:\Program Files. Add a line for each one. On my system, this is where they are installed, but it might be different for you.
- C:\Program Files (x86)\NuGet\
- C:\Program Files\IIS Express\
- C:\Program Files (x86)\Microsoft Visual Studio\2019\BuildTools\MSBuild\Current\Bin\
- Now click OK to save the Path. You will want to completely close all command prompts, powershells, and VS Code instances for this to take effect (or you can reboot for the nuclear option).
8. Open Your Project Directory with VS Code
This can be done from the windows explorer context menu, or from with VS Code under File > Open Folder. Note that this is different from Visual Studio... you do not want to try and open the .sln file. Most likely this will be the directory that is under version control, or the directory containing your .sln file.
On the left hand file explorer you should see all of the files in a tree similar to that normally seen on the right hand side of Visual Studio.
9. Build Your Solution
Following step 3, you are ready to code. But what about compiling your solution? In Visual Studio we have various build profiles that execute many different steps and custom scripts. Even the most basic project will still have a Debug and Release profiles by default. One of these must be specified when compiling.
To compile your solution, use the command line. VS Code has a nice built in command line that can be shown or hidden by typing Ctrl + ~ in the editor. By default on Windows this will open up PowerShell.
Make sure the prompt is in the directory containing the .sln file. First restore your nuget packages, then build your project using a custom profile:
PowerShell / Command Promptnuget restore msbuild /P:Configuration=Debug
Replacing Debug with whatever your custom build profile is. If you are a web developer, then you can now run a local web server with your built solution by specifying the path to the folder that contains the web.config:
PowerShell / Command Promptiisexpress.exe -path:"path\to-dir-with\web.config"
Tips and Tricks
Here are a few of my favorite tips that might aid in use of VS Code.
Ctrl + e and then start typing to quickly switch between files. It's a huge time-saver to avoid navigating the giant file tree, or having to hunt and peck for an open tab.
Use the built-in git diff tool to quickly see what you have changed. Click the "source control" icon in the left toolbar, and then double click on a file in the sidebar to view the changes